Publishing an Android app to the Google Play Store
A step-by-step guide on how to build and publish a SCADE app to the Google Play Store.
By default, SCADE builds a debug version of your app during runtime, but you can modify the build file of your app to prepare a release version of your app when you're ready.
Step One: You need to provide your app with a digital signature to publish on the Play Store. Follow these steps to sign your application:
- Skip to the next step If you already have a Keystore. If not, generate an Upload Keystore File by following the [Android Studio key generation steps] (https://developer.android.com/studio/publish/app-signing#sign-apk) or by running the following at the command line:
keytool -genkey -v -keystore ~/upload-keystore.jks -keyalg RSA -keysize 2048 -validity 10000 -alias uploadi. The aforementioned command saves the upload-keystore.jks file to your home directory. You can also change the argument you pass to the -keystore parameter if you want the upload-keystore.jks file saved in a different location. The Keystore file, however, should not be checked into public source control; keep it private!
- Create a file named keystore.properties that contains a reference to the keystore created above. This is how the keystore.properties file should be filled out:
storePassword=storePassword
keyPassword=keyPassword
keyAlias=alias
storeFile=<path_to>/upload-keystore.jks
Step Two: Configure the build.yaml file of your SCADE Project:
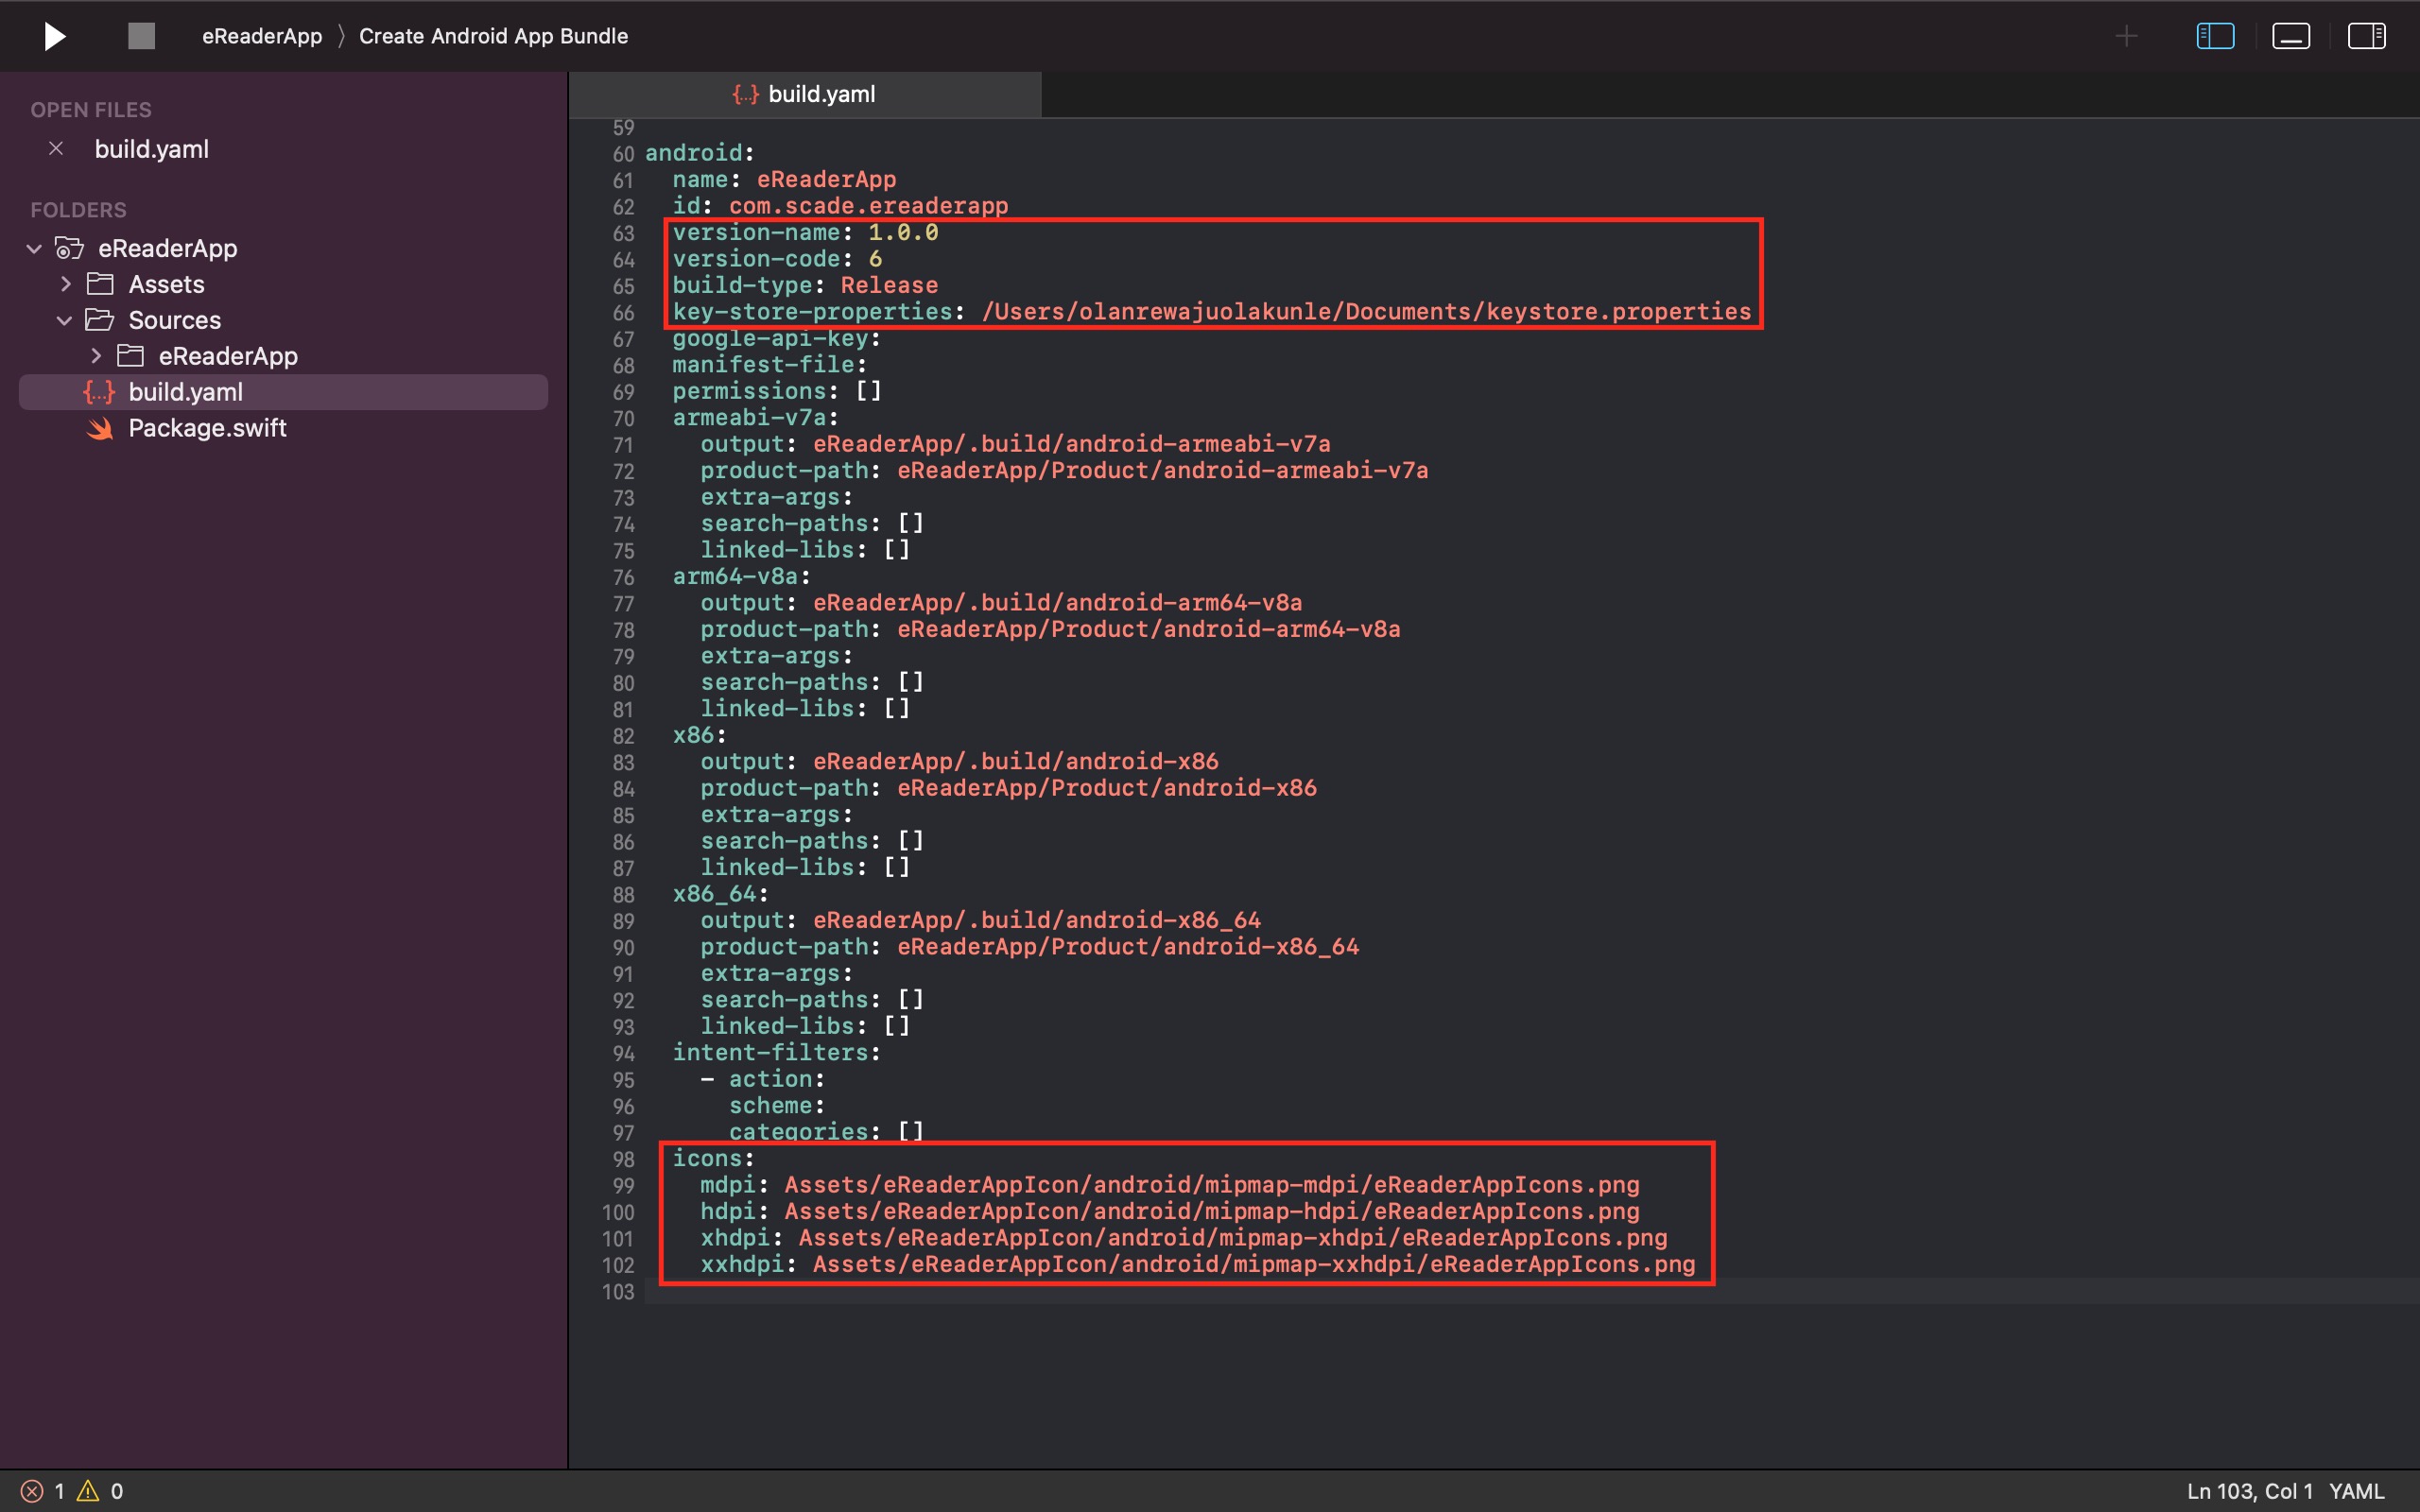
- Add the key-store-properties file you previously created to the key-store-properties path.
- To create an Android App Bundle or an APK file for your project, set Release as the build-type method.
- Update the app's version-name and version-code values. The app's version-name and version-code default values are "1.0.0" and "1", respectively. You can find and update them in the Android section of your app's build file.
- Add app icons to the icons section.
- Depending on the release option of your choice, select "Create Android App Bundle" or "Create APK" as the target from the Android Emulator dropdown menu:
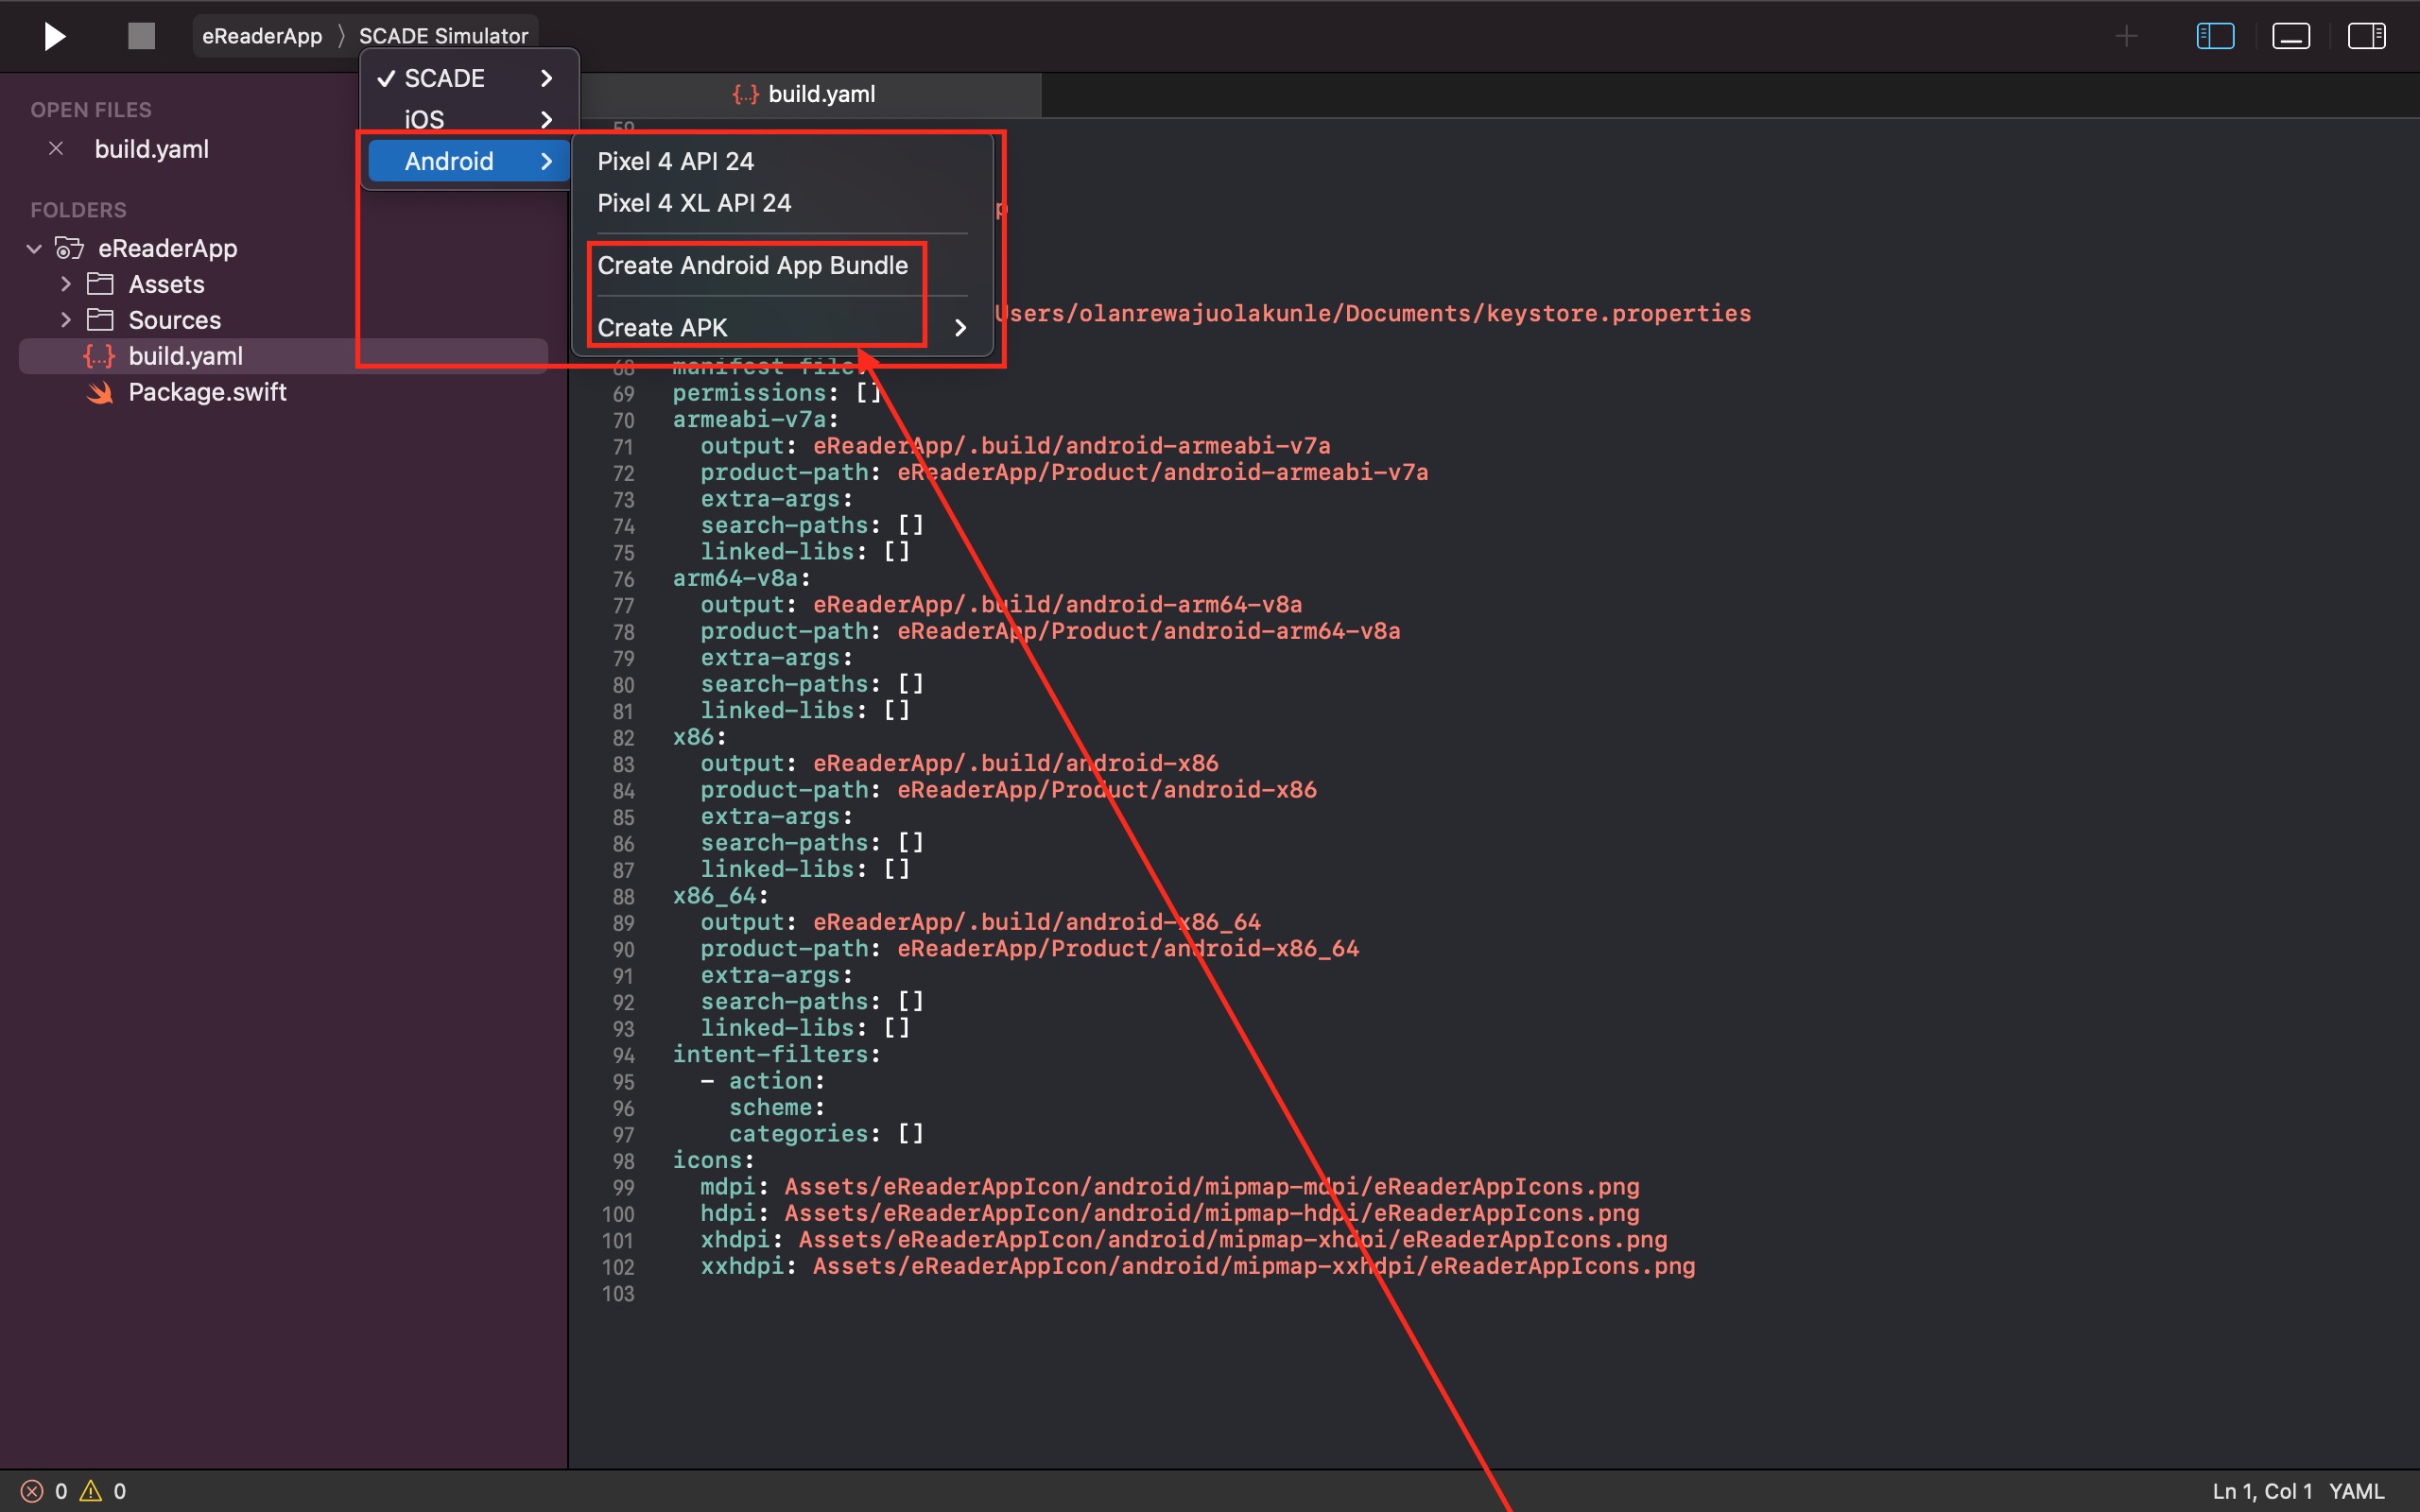
- Build the Android App Bundle or APK file in your project's build/Project Name/Product directory using the play button or Command + R.
i. Due to Google Play Store's preference, we recommend using the Android App Bundle format. For more details about this, see About Android App Bundles.
Step Three: Log on to your Google Play Console Account to create your app for release and provide the necessary details of your app where needed.
- Fill in the App Name, Default Language, App Type, Free or Paid Option, Required Checkboxes, Descriptions, and a good deal of other information needed upon the rollout of your new app release to the Google Play Store.
- Additionally, you must include an app icon, a feature graphic, and phone screenshots of your app where needed.
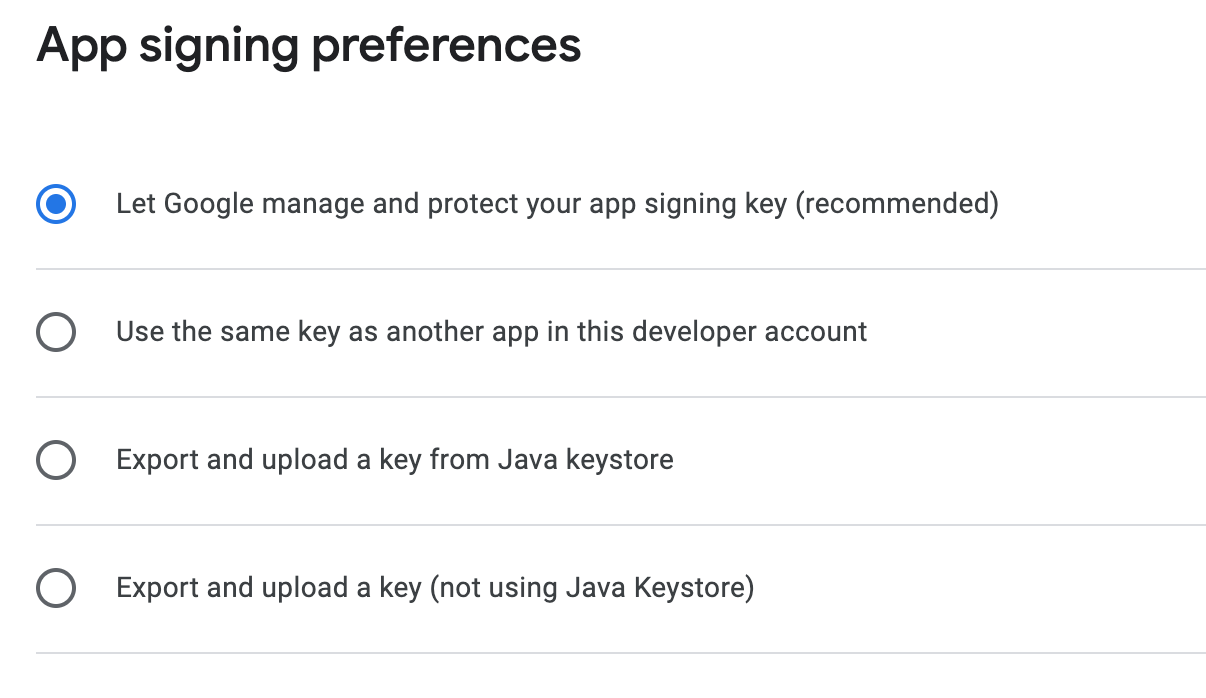
- Enroll and configure app signing under the App Integrity section of the Production page. We recommend you choose the option of allowing Google Play to generate an app signing key for you and use it to sign your app. Most especially, this option is a must for everyone that builds and uploads an Android App Bundle file:

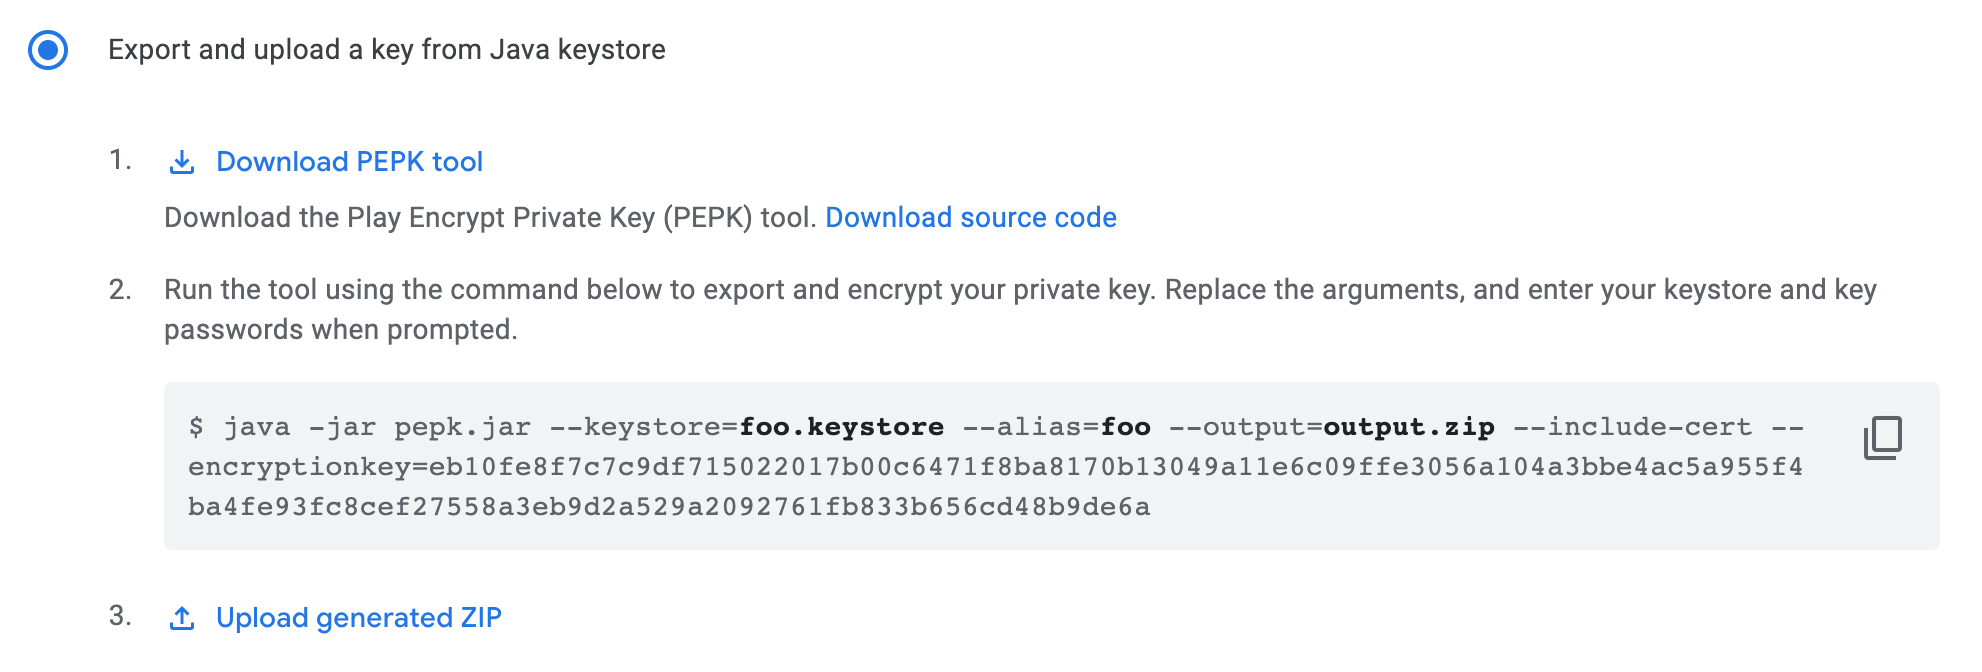
i. Alternatively, you can also decide to choose the option to "Export and upload a key from Java keystore" if your app has not yet been published to Google Play or your app is already signed and was published before August 2021 using an existing app signing key:
- While still on the Production page, navigate to the Release dashboard tab and upload the app bundle file into the App Bundle section along with a Release Note that will appear on the main page of your Google Play App:
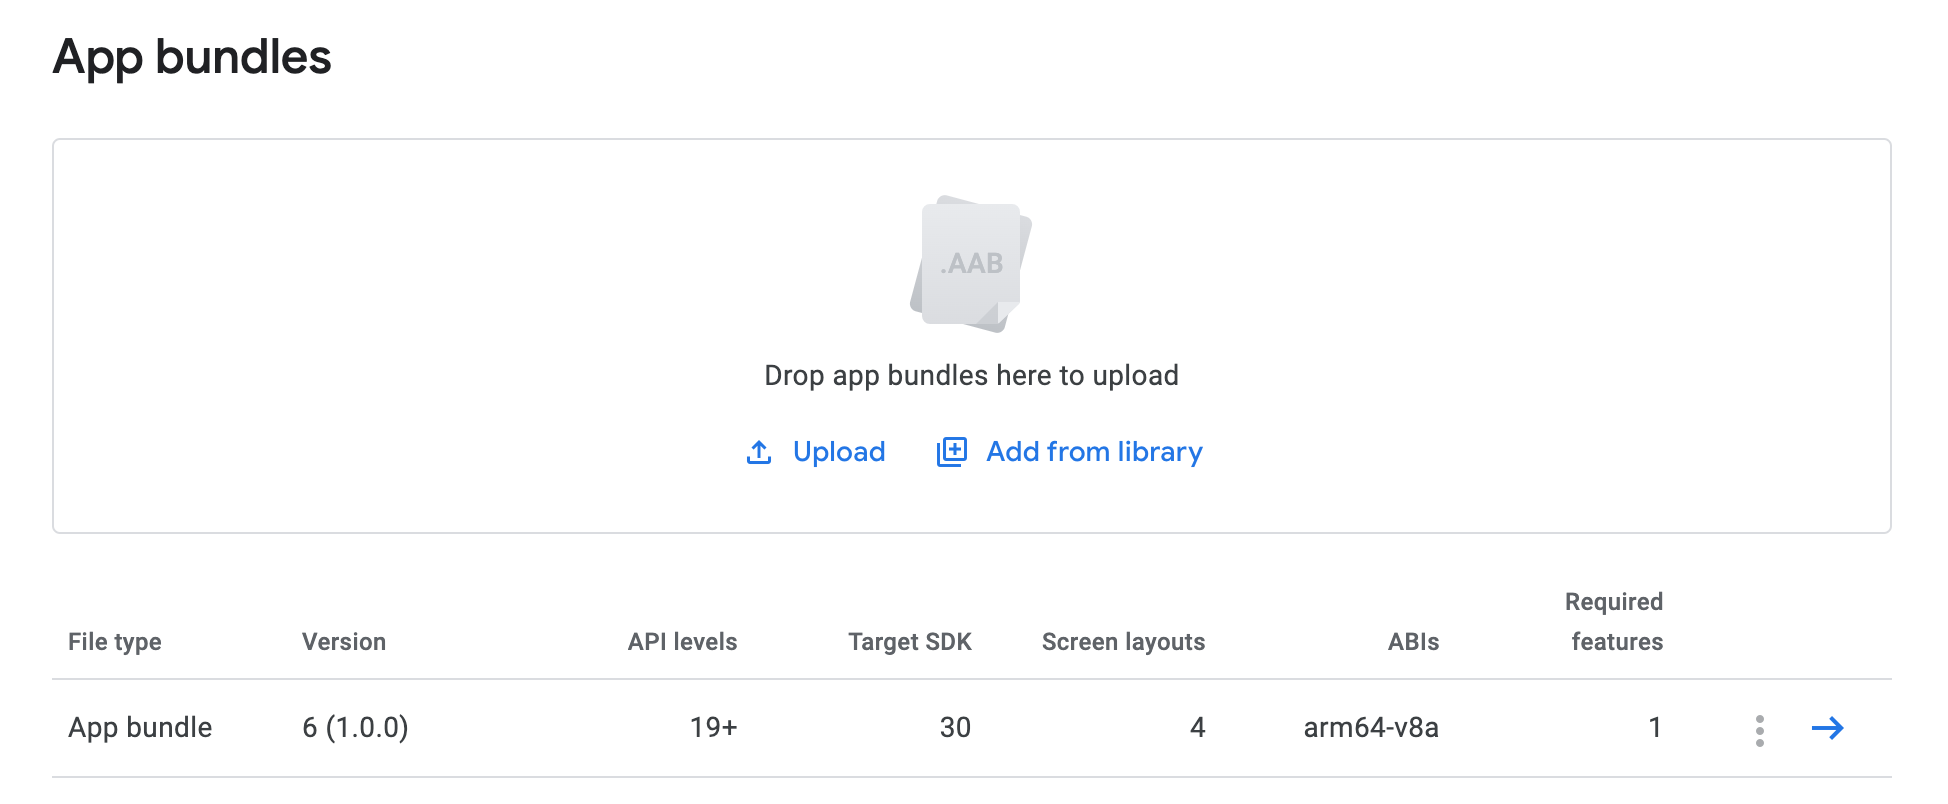
- After that, click on the Save and Review Release buttons before finally hitting the "Start Rollout To Production" button. Please read Prepare & roll out release of your app for more information.
Updated 2 months ago
