eReader App
Version 1.0 - November 2016
Sourcecode
Please see the SimplyE project for the source code created in this chapter. See Installing examples for information on how to download the examples from https://github.com/scadedoc/UgExamples/tree/master/SimplyE
Introduction
SimplyE is a great eReader app for searching and reading preferred books and magazines on the screen of mobile devices with ease.
Note: We are implementing a few parts of the app for demonstration purposes. The focused areas are:
- the Login page, displaying the NYPL logo and loading data in the background
- the Catalog page, displaying all books by category
- the Detail view, displaying details of a specific book
- the Settings page, to demonstrate how to implement a decent settings page
Other features of the app are out of scope and may be covered at a later time.
Create the start page
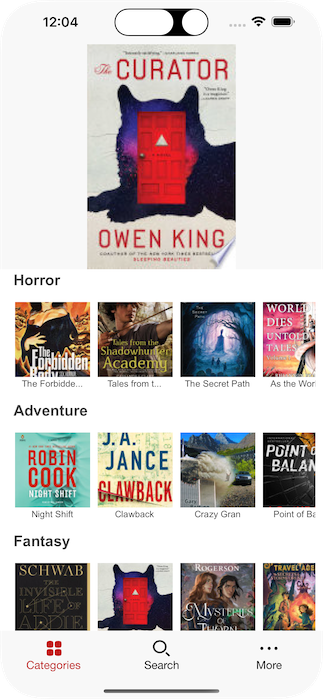
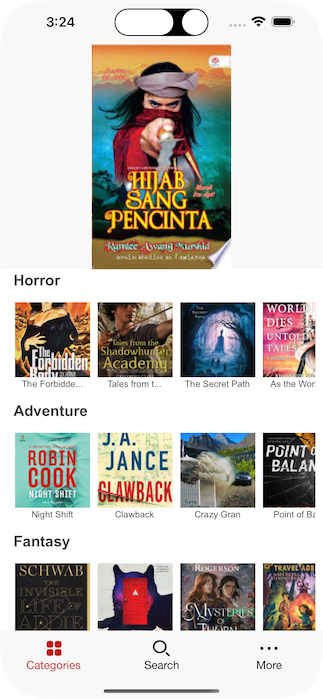
The start page displays the NYPL lion's white-head logo on the screen while loading all the data in the background. In other words, we are configuring the login page to be the first screen visible to the users when the application is launched. It's relatively simple to create:

- Create a new project and name it "SimplyE" (! is not a valid character, compiler complains)2
- Add a Login page
- Designed the login page to display a logo sitting centrally on a red background
- Add code that you want to execute during startup inside the
login.page.swiftfile, for instance preloading data
import Dispatch
import Foundation
import ScadeKit

class LoginPageAdapter: SCDLatticePageAdapter {

  // page adapter initialization
  override func load(_ path: String) {
    super.load(path)
  }

  override func show(view: SCDLatticeView?) {

    // call parent to finish display activities
    super.show(view: view)

    // add code here that is executed
    // after the display of the page
    self.postDisplayActions()

  }

  func postDisplayActions() {
    // put actions that shall happen
    // after the display of the page here
    DispatchQueue.main.asyncAfter(deadline: .now() + 1) {
      Navigation.go(.main, clearHistory: false, transition: .fromLeft)
    }
  }

}
Create the Catalog Browsing Page
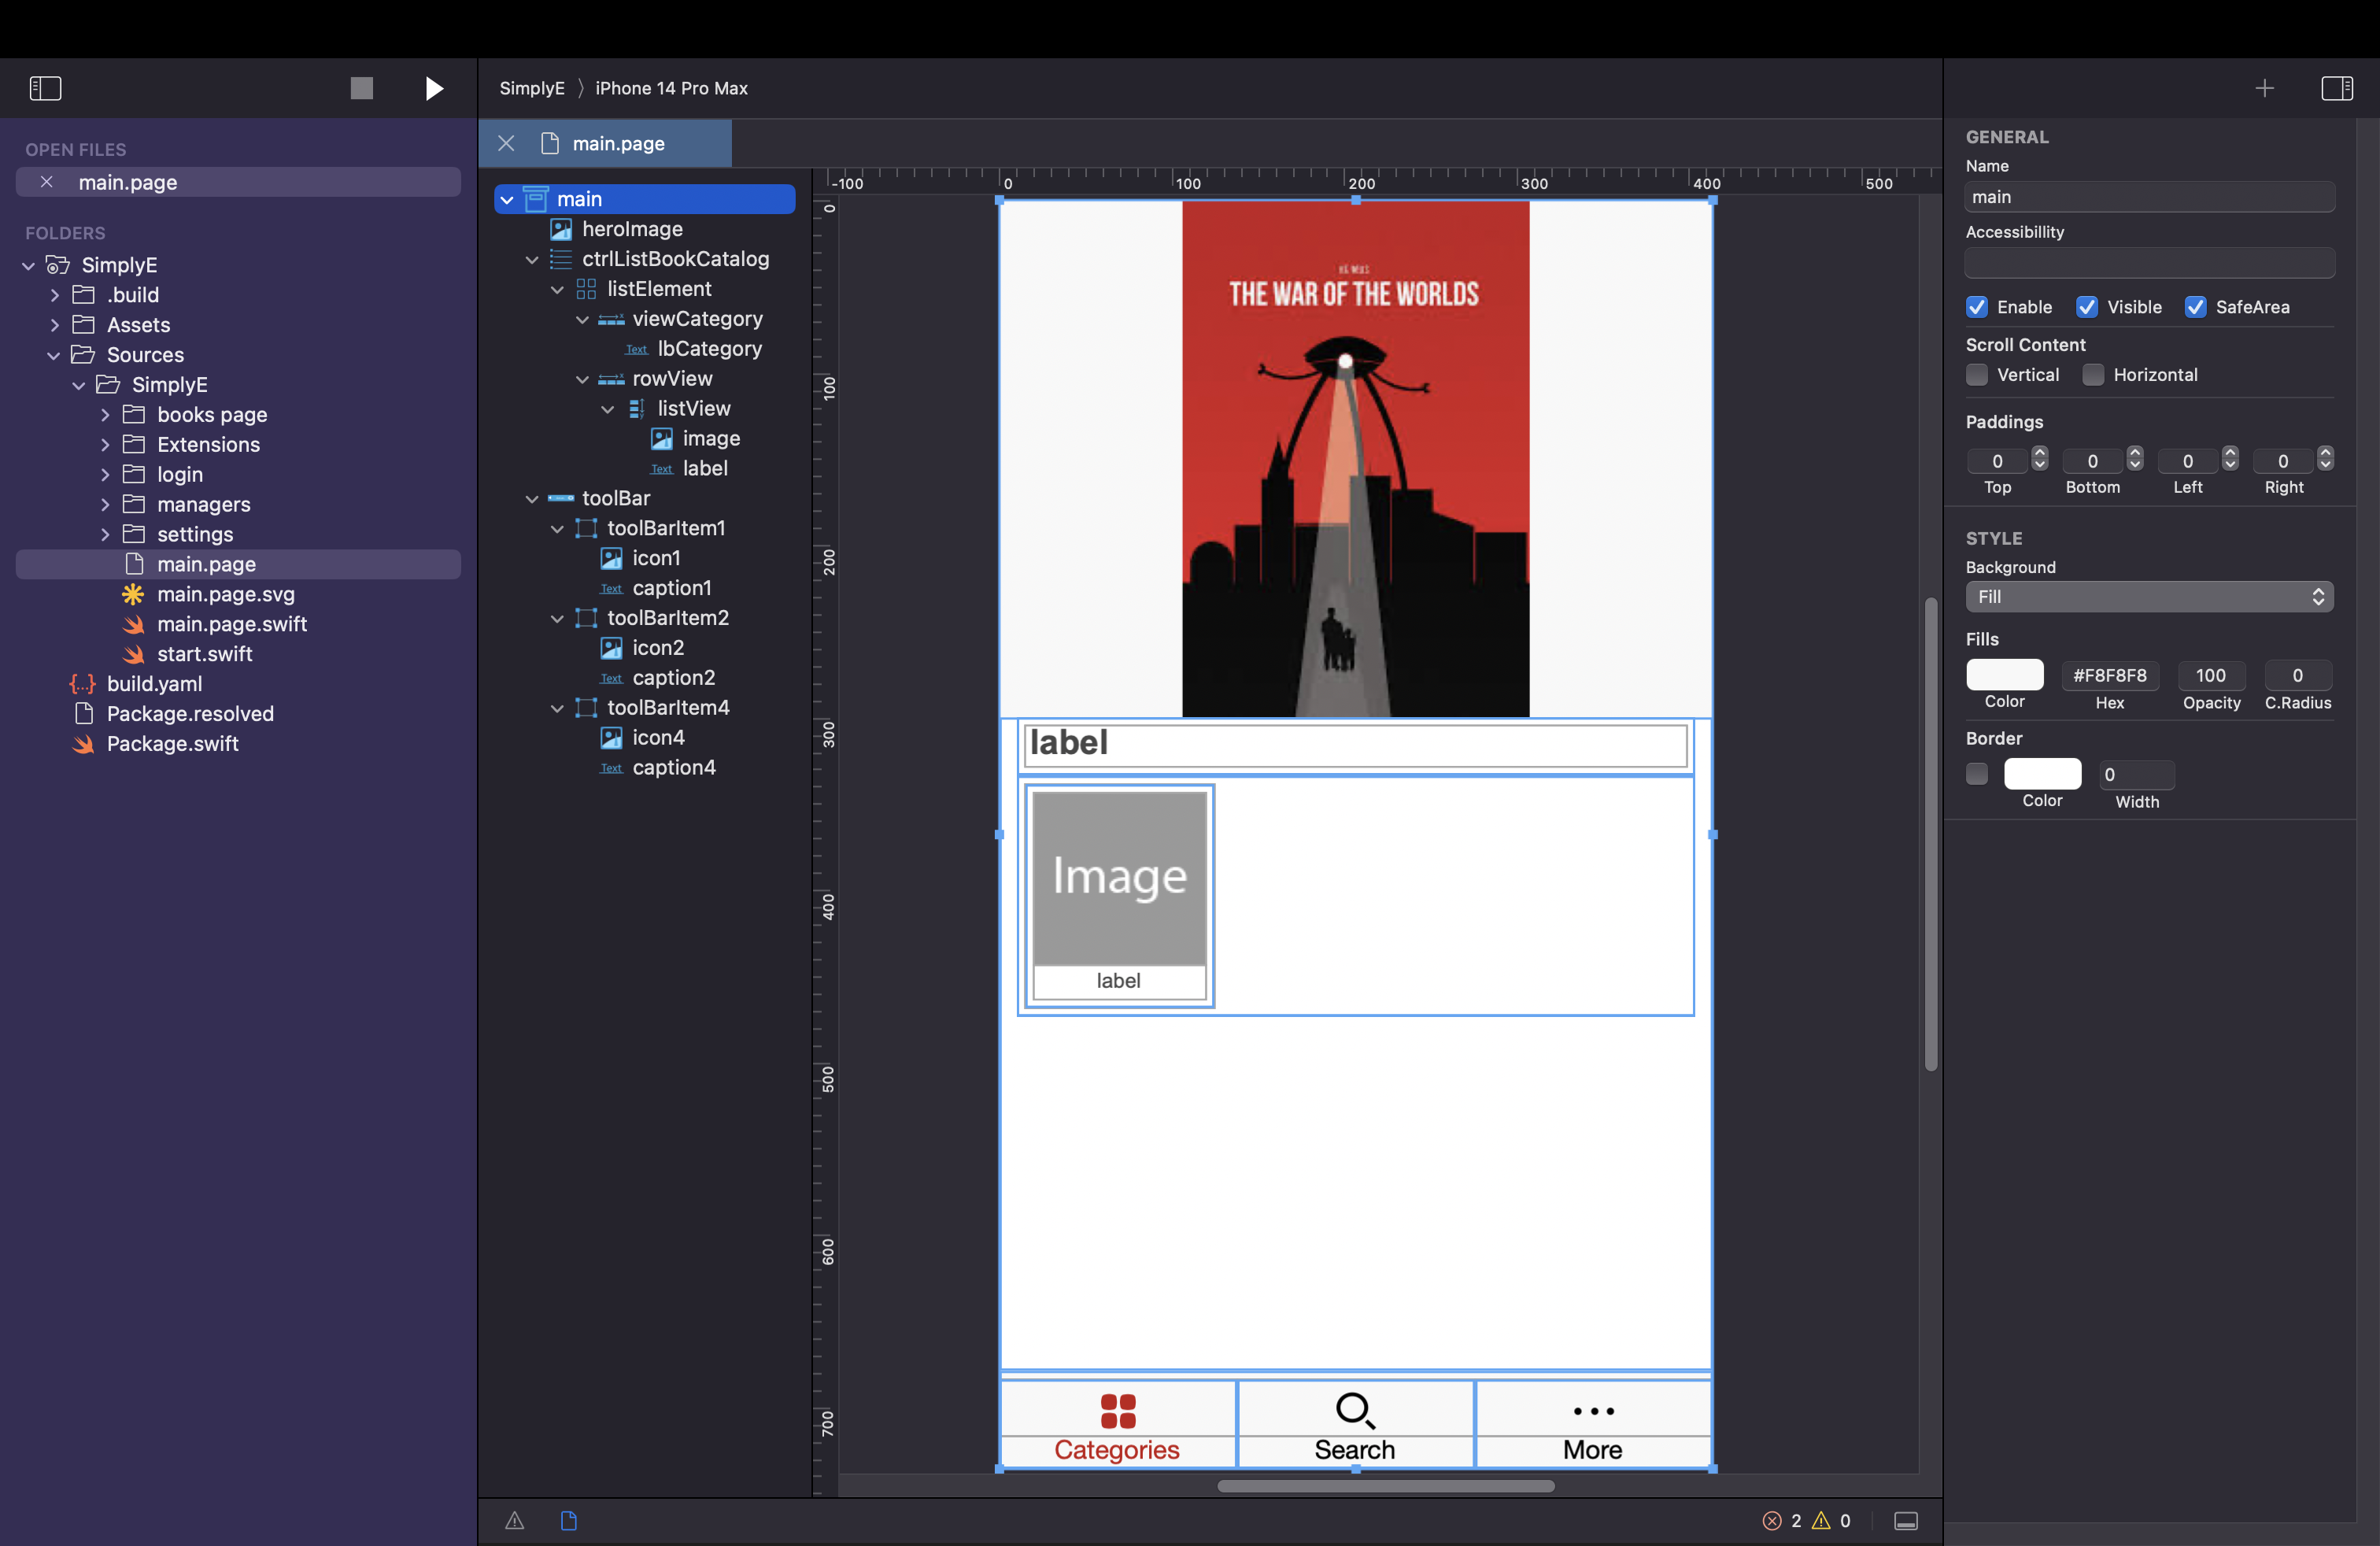
In this step, we create the overall catalog page and structure:
The AutoLayout or GridLayout are both suitable options for this page. The major reason we chose the AutoLayout was to assign a fixed height to the heroImage.
- Choose AutoLayout as the layout type for this page.
- This page is divided into three parts: heroImage, ctrlListBookCatalog and toolbar
- We are using theheroImage, an image control, to randomly display the images of every book in every category when the catalog browsing page is entered. For the heroImage:
- Add an image control
- Use the constraints to position it and give it a fixed height of 300.
- The ctrlListBookCatalog is simply a list control we aim at using to display both the categories label and a list of images and labels that represent the books that belong to each category. Follow the following steps to create the ctrlListBookCatalog:
- Add list control (Containers - list view) and call it ctrlListBookCatalog
- Add two horinzontal grid into the list control and name them viewCategory and rowView, respectively.
- Put a label within viewCategory with the name lbCategory.
- For each book in a category, add a vertical grid, named listView, to contain both its image and label inside rowView.
- Adjust the position and size of each control within the ctrlListBookCatalog using the layout properties.
- Each grid (grid view, linear horizontal or vertical grid) can be assigned the ability to support scrolling. We added a horizontal scrolling effect to the rowView via its Scroll-Content functionality.
- The listView inside the rowView receives this horizontal scrolling effect since the aim is to horizontally scroll at each book in each category.
- The toolBar is added for navigating in and out of the catalog browsing page. For the toolBar:,
- Add a toolbar container and divide it to contain three toolBarItems.
- By default, the toolBarItems come with an icon and a caption label. Set the preferred bitmaps into the Image Path of each icon
- Also, replace the text of the caption labels with the right ones.
- Make use of the layout properties to position and size the toolBarItems and their respective elements inside the toolBar
Use the AL constraint dialog to place the heroImage at the top of the screen, the ctrlListBookCatalog directly below the heroImage and the toolbar at the bottom of the screen.
Create Data Classes and Connect them to the API Callers
First, we need a book category class that holds the name and label of each book category alongside the lists of books they contain.
import Foundation
import ScadeKit

class Genre: EObject {
  let name: String
  let books: [Book]
  let lbCategory: String

  init(name: String, books: [Book], lbCategory: String) {
    self.name = name
    self.books = books
    self.lbCategory = lbCategory
  }
}
Next is to create a Book class to retrieve all the information about a particular book. Then, create an items array of type Book in a struct called TrendingBookResponse. Note that all our book categories API will be talking to the items array. Ensure all created classes inherit from EObject.
import Foundation
import ScadeKit

struct TrendingBookResponse: Codable {

  let items: [Book]?
}

class Book: EObject, Codable {

  let id: String
  let volumeInfo: VolumeInfoElements
  let publisher: String?
  let previewLink: String?
}

struct VolumeInfoElements: Codable {

  let title: String?
  let subtitle: String?
  let authors: [String]?
  let pageCount: Int?
  let imageLinks: imageLinksElements
  let description: String?
  let publishedDate: String?
  let language: String?
  let averageRating: Float?
  let previewLink: String?
}

struct imageLinksElements: Codable {

  let smallThumbnail: String?
  let thumbnail: String?
}
Decode the data you get from each category of books and store them in the items array as earlier mentioned.
import Foundation

struct constants {

  static let API_Key = "AIzaSyB_rT2ztHdM7Ac095GgMbzZfNeL_o_-m1U"
  static let baseURL = "https://www.googleapis.com/books/v1/volumes?"

}

enum APIError: Error {
  case FailedTogetData
}

class APICaller {

  static let shared = APICaller()

  func getBooksOfGenre(with name: String, completion: @escaping (Result<[Book], Error>) -> Void) {
    var genreParam: String = ""

    switch name {
    case "Adventure": genreParam = "thriller"
    case "Fantasy": genreParam = "fantasy"
    case "Horror": genreParam = "horror"
    case "Health": genreParam = "health"
    default:
      completion(.failure(APIError.FailedTogetData))
      return
    }


    guard let url = URL(string:
          "\(constants.baseURL)q=subject:\(genreParam)&download=epub&orderBy=newest&key=\(constants.API_Key)"
      )
    else { return }

    let task = URLSession.shared.dataTask(with: URLRequest(url: url)) { data, _, error in

      guard let data = data, error == nil else {
        return
      }

      do {
        let items = try JSONDecoder().decode(TrendingBookResponse.self, from: data)

        DispatchQueue.main.async {
          completion(.success(items.items ?? []))
        }
      } catch {
        print("Unexpected error: \(error).")
        DispatchQueue.main.async {
          completion(.failure(APIError.FailedTogetData))
        }
      }
    }

    task.resume()
  }
Finally, call the above method, getBooksOfGenre(), inside a newly created method named fetchGenre() and connect its result to the books array of the Genre class. We also have to provide the fetchGenre() method with two parameters (name and lbCategory) and assign these two parameters to the name and lbCategory properties of the Genre class.
Note that the values for the two fetchGenre() arguments will be given later when we append each category's fetchGenre() method result to the ctrlListBookCatalog's items property.
public func fetchGenre(with name: String, lbCategory: String, callback: @escaping (Genre) -> Void) {
    APICaller.shared.getBooksOfGenre(with: name) { result in
      switch result {
      case .success(let books):
        callback(Genre(name: name, books: books, lbCategory: lbCategory))

      case .failure(let error):
        print(error.localizedDescription)
      }
    }
  }
Bind data to the Controls inside the Catalog Browsing Page
Note that every logic/data meant for the catalog browsing page must be entered into the page's Page Adapter class.
Data for the heroImage
We'll need two variables to make this happen:
- Create a variable and an empty array of type
BookcalledselectedBookandrandomBooks, respectively. - Create an
addRandomBooks(_ books: [Book])method to fill up the emptyrandomBooksarray with each category list of books' data. - Call the
addRandomBooks(_ books: [Book])method inside each books' category method (fetchAdventure(),fetchFantasy(),fetchHorror(), andfetchHealth()) to achieve the above. - Create a
showRandomBook()method and initialize theselectedBookvariable with a random element from therandomBooksarray. Also, ensure to provide a means of downloading the image of the selected book inside the sameshowRandomBook()method. - For the
heroImageto change to the image of theselectedBookanytime the catalog browsing page is entered, we need to call the showRandomBook() method inside theonEnter()method in theload()method.
import Dispatch
import Foundation
import ScadeKit
import ScadeUI

class MainPageAdapter: SCDLatticePageAdapter {

  public var randomBooks: [Book] = []

  public var selectedBook: Book?

  // page adapter initialization
  override func load(_ path: String) {
    super.load(path)

    self.page?.onEnter.append(
      SCDWidgetsEnterEventHandler { [weak self] _ in
        self?.showRandomBook()
      })

    self.fetchAdventure()

    self.fetchFantasy()

    self.fetchHorror()

    self.fetchHealth()

 }

  private func addRandomBooks(_ books: [Book]) {
    self.randomBooks.append(contentsOf: books)
    showRandomBook()
  }

  private func showRandomBook() {
    if selectedBook != nil {
      CatalogManager.loadDataAsync(
        from: selectedBook?.volumeInfo.imageLinks.thumbnail ?? "no image", queue: .main
      ) { [weak self] data in
        guard let self = self else { return }

        self.heroImage.content = data
        self.heroImage.contentPriority = true
      }
    }

    DispatchQueue.main.async {
      self.selectedBook = self.randomBooks.randomElement()
    }
  }

  private func fetchAdventure() {
    CatalogManager.shared.fetchGenre(with: "Adventure", lbCategory: "Adventure") { [weak self] adventure in
      self?.addRandomBooks(adventure.books)
    }
  }

  private func fetchFantasy() {
    CatalogManager.shared.fetchGenre(with: "Fantasy", lbCategory: "Fantasy") {[weak self] fantasy in
      self?.addRandomBooks(fantasy.books)
    }
  }

  private func fetchHorror() {
    CatalogManager.shared.fetchGenre(with: "Horror", lbCategory: "Horror") { [weak self] horror in
      self?.addRandomBooks(horror.books)
    }
  }

  private func fetchHealth() {
    CatalogManager.shared.fetchGenre(with: "Health", lbCategory: "Health") { [weak self] health in
      self?.addRandomBooks(health.books)
    }
  }

}
Data for ctrlListBookCatalog
- We need to call
elementProvideron thectrlListBookCatalogso that we can bind the controls inside it to the model (Genreclass). - Ensure that every control inside the
ctrlListBookCatalogis properly defined before they are connected to the model to avoid errors during compilation. - Add the result of all categories methods (
fetchAdventure(),fetchFantasy(),fetchHorror(), andfetchHealth()) to theitemsproperty of thectrlListBookCatalog. This is the data the bound controls to the model will depend on upon loading on the screen.
import Dispatch
import Foundation
import ScadeKit
import ScadeUI

class MainPageAdapter: SCDLatticePageAdapter {

  let MAX_BOOK_NAME_LENGTH = 15

  // page adapter initialization
  override func load(_ path: String) {
    super.load(path)

    self.fetchAdventure()

    self.fetchFantasy()

    self.fetchHorror()

    self.fetchHealth()

    self.ctrlListBookCatalog.elementProvider { (genre: Genre, element) in
      guard let viewCategory = element["viewCategory", as: SCDWidgetsRowView.self],
        let rowView = element["rowView", as: SCDWidgetsRowView.self],
        let listView = rowView["listView", as: SCDWidgetsListView.self]
      else { return }

      if let lbCategory = viewCategory["lbCategory", as: SCDWidgetsLabel.self] {
        lbCategory.text = genre.lbCategory
      }

      // rowView - horizontal list with book containers
      // listView - book container(template)

      (rowView.layout as? SCDLayoutGridLayout)?.columns = genre.books.count

      var bookViewList: [SCDWidgetsListView] = [listView]

      //create N - 1 book containers by coping first container, created in ScadeIDE
      for _ in 1..<genre.books.count {
        bookViewList.append(listView.copyControl() as! SCDWidgetsListView)
      }

      // set data for every book container
      for (index, book) in genre.books.enumerated() {
        let bookView = bookViewList[index]

        (bookView.layoutData as? SCDLayoutGridData)?.column = index
        bookView.visible = true

        if let label = bookView["label ", as: SCDWidgetsLabel.self] {
          let text = book.volumeInfo.title ?? "no title"

          //Solving cutoff texts in Label
          var truncated = text

          if text.count > self.MAX_BOOK_NAME_LENGTH {
            let index = text.index(text.startIndex, offsetBy: self.MAX_BOOK_NAME_LENGTH - 3)
            truncated = "\(text.prefix(upTo: index))..."
          }

          label.text = truncated
          (label.layoutData as? SCDLayoutGridData)?.maxContentWidth = 100
        }

        if let bitmap = bookView["image", as: SCDWidgetsImage.self] {
          CatalogManager.loadDataAsync(
            from: book.volumeInfo.imageLinks.thumbnail ?? "no image", queue: .main
          ) { [weak bitmap] data in
            bitmap?.content = data
          }
        }
      }
      // add book containers to the horizontal list *rowView*
      rowView.children = bookViewList
    }
  }

  private func fetchAdventure() {
    CatalogManager.shared.fetchGenre(with: "Adventure", lbCategory: "Adventure") { [weak self] adventure in
      self?.ctrlListBookCatalog.items.append(adventure
    }
  }

  private func fetchFantasy() {
    CatalogManager.shared.fetchGenre(with: "Fantasy", lbCategory: "Fantasy") { [weak self] fantasy in
      self?.ctrlListBookCatalog.items.append(fantasy)
    }
  }

  private func fetchHorror() {
    CatalogManager.shared.fetchGenre(with: "Horror", lbCategory: "Horror") { [weak self] horror in
      self?.ctrlListBookCatalog.items.append(horror)
    }
  }

  private func fetchHealth() {
    CatalogManager.shared.fetchGenre(with: "Health", lbCategory: "Health") { [weak self] health in
      self?.ctrlListBookCatalog.items.append(health)
    }
  }
}
Add book clicked event
Let's add an event handler to every book inside the listView. The event handler fires whenever a specific book is clicked to navigate to the book detail page.
import Dispatch
import Foundation
import ScadeKit
import ScadeUI

class MainPageAdapter: SCDLatticePageAdapter {

  // page adapter initialization
  override func load(_ path: String) {
    super.load(path)

    ...

    self.ctrlListBookCatalog.elementProvider { (genre: Genre, element) in
    ...

     guard let listView = rowView["listView", as: SCDWidgetsListView.self]
      else { return }

      // rowView - horizontal list with book containers
      // listView - book container(template)

      (rowView.layout as? SCDLayoutGridLayout)?.columns = genre.books.count

      var bookViewList: [SCDWidgetsListView] = [listView]

      //create N - 1 book containers by coping first container, created in ScadeIDE
      for _ in 1..<genre.books.count {
        bookViewList.append(listView.copyControl() as! SCDWidgetsListView)
      }

      // set data for every book container
      for (index, book) in genre.books.enumerated() {
        let bookView = bookViewList[index]

        (bookView.layoutData as? SCDLayoutGridData)?.column = index
        bookView.visible = true

        bookView.onClick.append(
          SCDWidgetsEventHandler { [weak book] event in
            guard let book = book else { return }
            Navigation.go(.BookDetail, with: book)
            //self.navigation?.goWith(page: "BookDetail.page", data: book)

      ...

          })
      // add book containers to the horizontal list *rowView*
      rowView.children = bookViewList
    }
  }
}
Add toolBarItems clicked event
The toolBar's toolBarItems2 and toolBarItem3 of the toolBar, on the catalog browsing page, lead to the settings page and the search page, respectively. Provide both of them with an onClick() method to accomplish this.
import Dispatch
import Foundation
import ScadeKit
import ScadeUI

class MainPageAdapter: SCDLatticePageAdapter {

  // page adapter initialization
  override func load(_ path: String) {
    super.load(path)

    self.toolBarItem2.onClick { _ in
      Navigation.go(.search, clearHistory: true)
    }

    self.toolBarItem3.onClick { _ in
      Navigation.go(.settings, clearHistory: true)
    }
  }
}
Create the book detail page
Create a new page called BookDetail.page that shows each book details. The following outline illustrates the structure of the page.
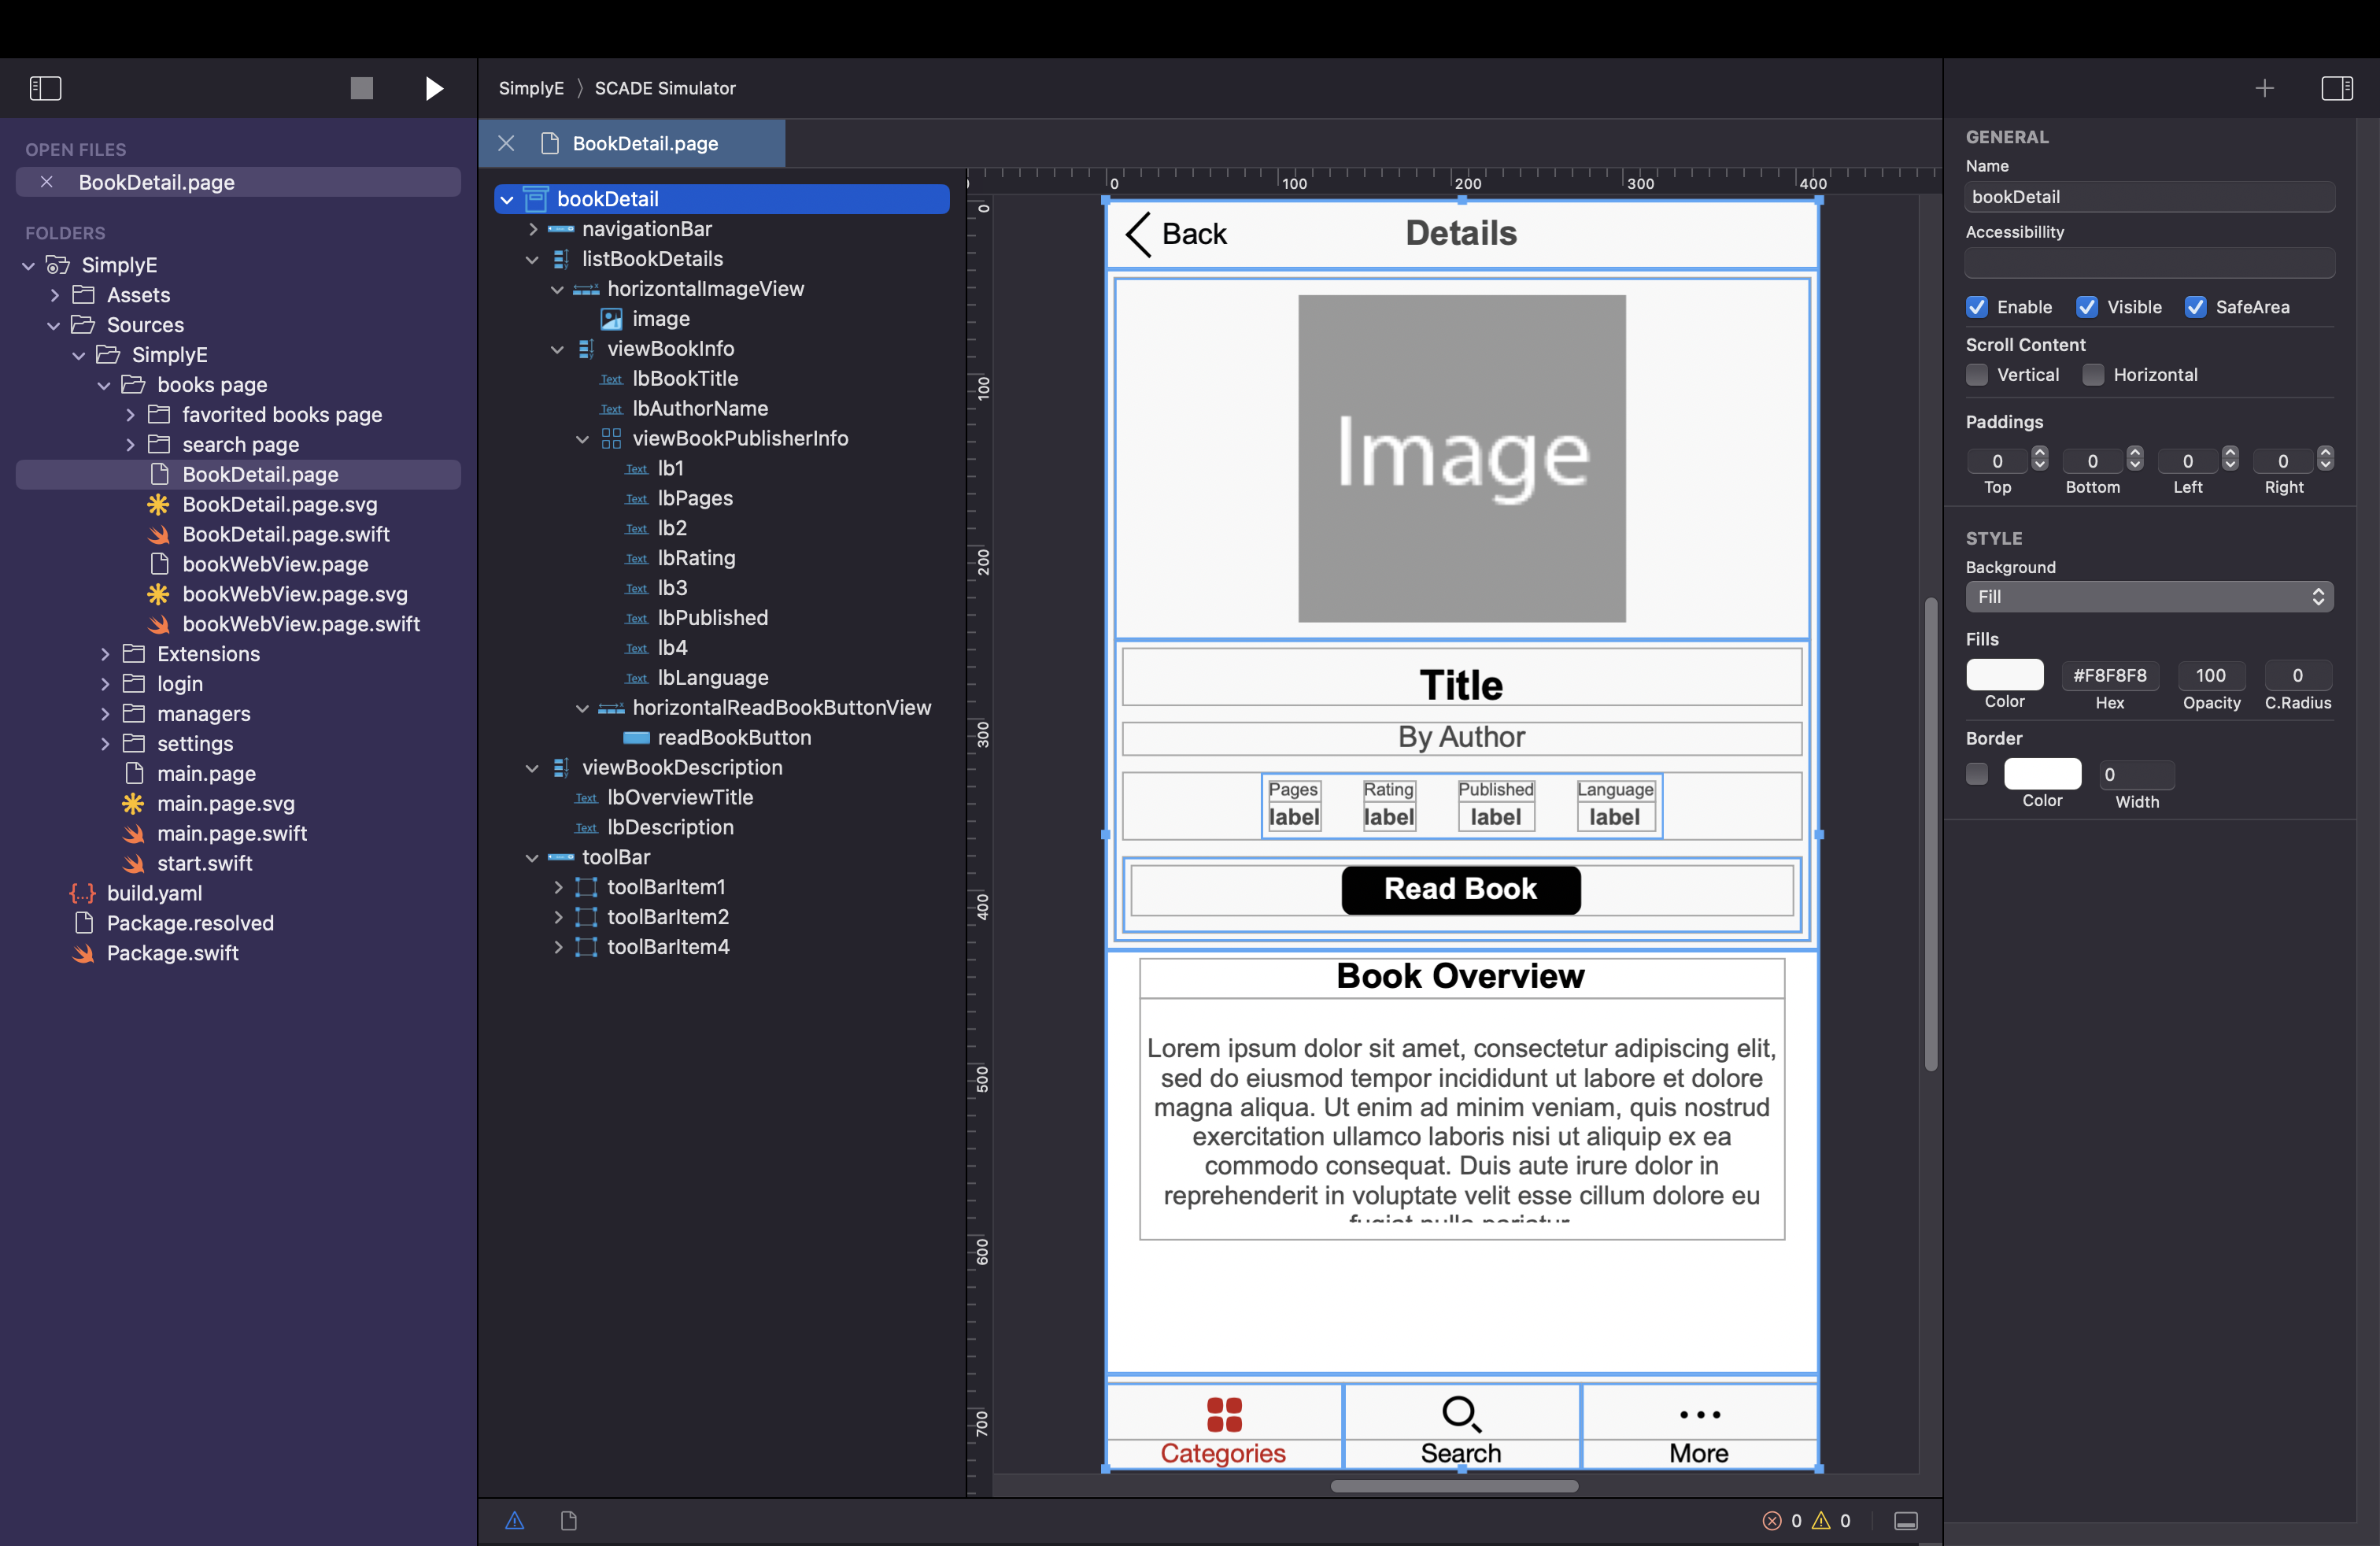
- We used AutoLayout as the layout type for this page, just like we did for the catalogue browsing page.
- This page is divided into four parts: navigationBar, listBookDetails, viewBookDescription and toolbar.
- The navigationBar sits on top of the page having 0 top, left, and right constraints.
i. It has a child widget called the backButton, when clicked, navigates users back to the catalog browsing page
ii. we also added a label to it to describe that it's a book detail page. - listBookDetails is a vertical container with two rows containing the horizontalImageView and viewBookInfo. it comes next directly under the navigationBar with 0 top constraint to it and 0 left and right constraints in respect to the book detail page.
i. An image control to display each book cover is wrapped inside the horizontalImageView for better alignment.
ii. The viewBookInfo contains the lbBookTitle, lbAuthorName, a grid (for showing key info such as page count, rating, book language, and published date), and the readBookButton.
iii. The readBookButton is also wrapped inside a horizontal layout container for better alignment. - The viewBookDescription container is activated with a vertical scroll content capability because of the multiline feature we toggled on one of its children called the lbDescription label that holds the overview.
The viewBookDescription is placed at 0 top constraint to the listBookDetails container.
The video gives a good example of how to use containers (horizontal linear layout containers mostly) to structure the page. Most notable settings
Bind to BookDetails page
We make use of the show() method to bind the Book model to the BookDetail page. Whenever a book is clicked, the show() method is called to display to display the book's details on the screen.
Inside the BookDetailPageAdapter class, we called the show() method and downcast the Book model with its result assigned to the data parameter of the show() method along with all the significant controls in the BookDetail page.
import Dispatch
import Foundation
import ScadeKit

class BookDetailPageAdapter: SCDLatticePageAdapter {

  var book: Book?

  // page adapter initialization
  override func load(_ path: String) {
    super.load(path)
  }

  override func show(view: SCDLatticeView?, data: Any) {
    super.show(view: view, data: data)

    if let book = data as? Book {
      //print("show book: \(book.volumeInfo.title)")

      self.book = book

      lbBookTitle.text = book.volumeInfo.title ?? ""
      lbAuthorName.text = "by \(book.volumeInfo.authors?[0] ?? "Nothing")"
      lbPublished.text = book.volumeInfo.publishedDate ?? ""
      lbLanguage.text = book.volumeInfo.language ?? ""
      lbDescription.text =
        book.volumeInfo.description ?? "No Overview available for this Particular Book"
      lbPages.text = book.volumeInfo.pageCount.map(String.init(describing:)) ?? "NA"
      lbRating.text = book.volumeInfo.averageRating.map(String.init(describing:)) ?? "NA"

      if let bitmap = horizontalImageView["image", as: SCDWidgetsImage.self] {
        CatalogManager.loadDataAsync(
          from: book.volumeInfo.imageLinks.thumbnail ?? "no image", queue: .main
        ) { [weak bitmap] data in
          bitmap?.content = data
        }
      }

    }

  }

}
For handling navigations out of the BookDetail page to pages such as the catalog browsing page, bookWebView page, search page, etc., it's advisable to call the onClick() method on the required controls/widgets in the load() method. This is because the show() method re-renders the page anytime an item is called inside it.
import Dispatch
import Foundation
import ScadeKit

class BookDetailPageAdapter: SCDLatticePageAdapter {

  // page adapter initialization
  override func load(_ path: String) {
    super.load(path)

    self.backButton.onClick { _ in
      Navigation.back()
      //self.goBack()
    }

    self.image1.onClick { _ in
      Navigation.back()
      //self.goBack()
    }

    self.toolBarItem1.onClick { _ in
      Navigation.go(.main)
    }

    self.toolBarItem2.onClick { _ in
      Navigation.go(.search)
    }

    self.toolBarItem4.onClick { _ in
      Navigation.go(.settings)
    }

    self.readBookButton.onClick { _ in
      Navigation.go(.bookWebView, with: self.book ?? "")
    }
  }
}
Create the settings page
The settings page presents a list of options for making settings. We like to demonstrate how to use the page editor to recreate the design below.
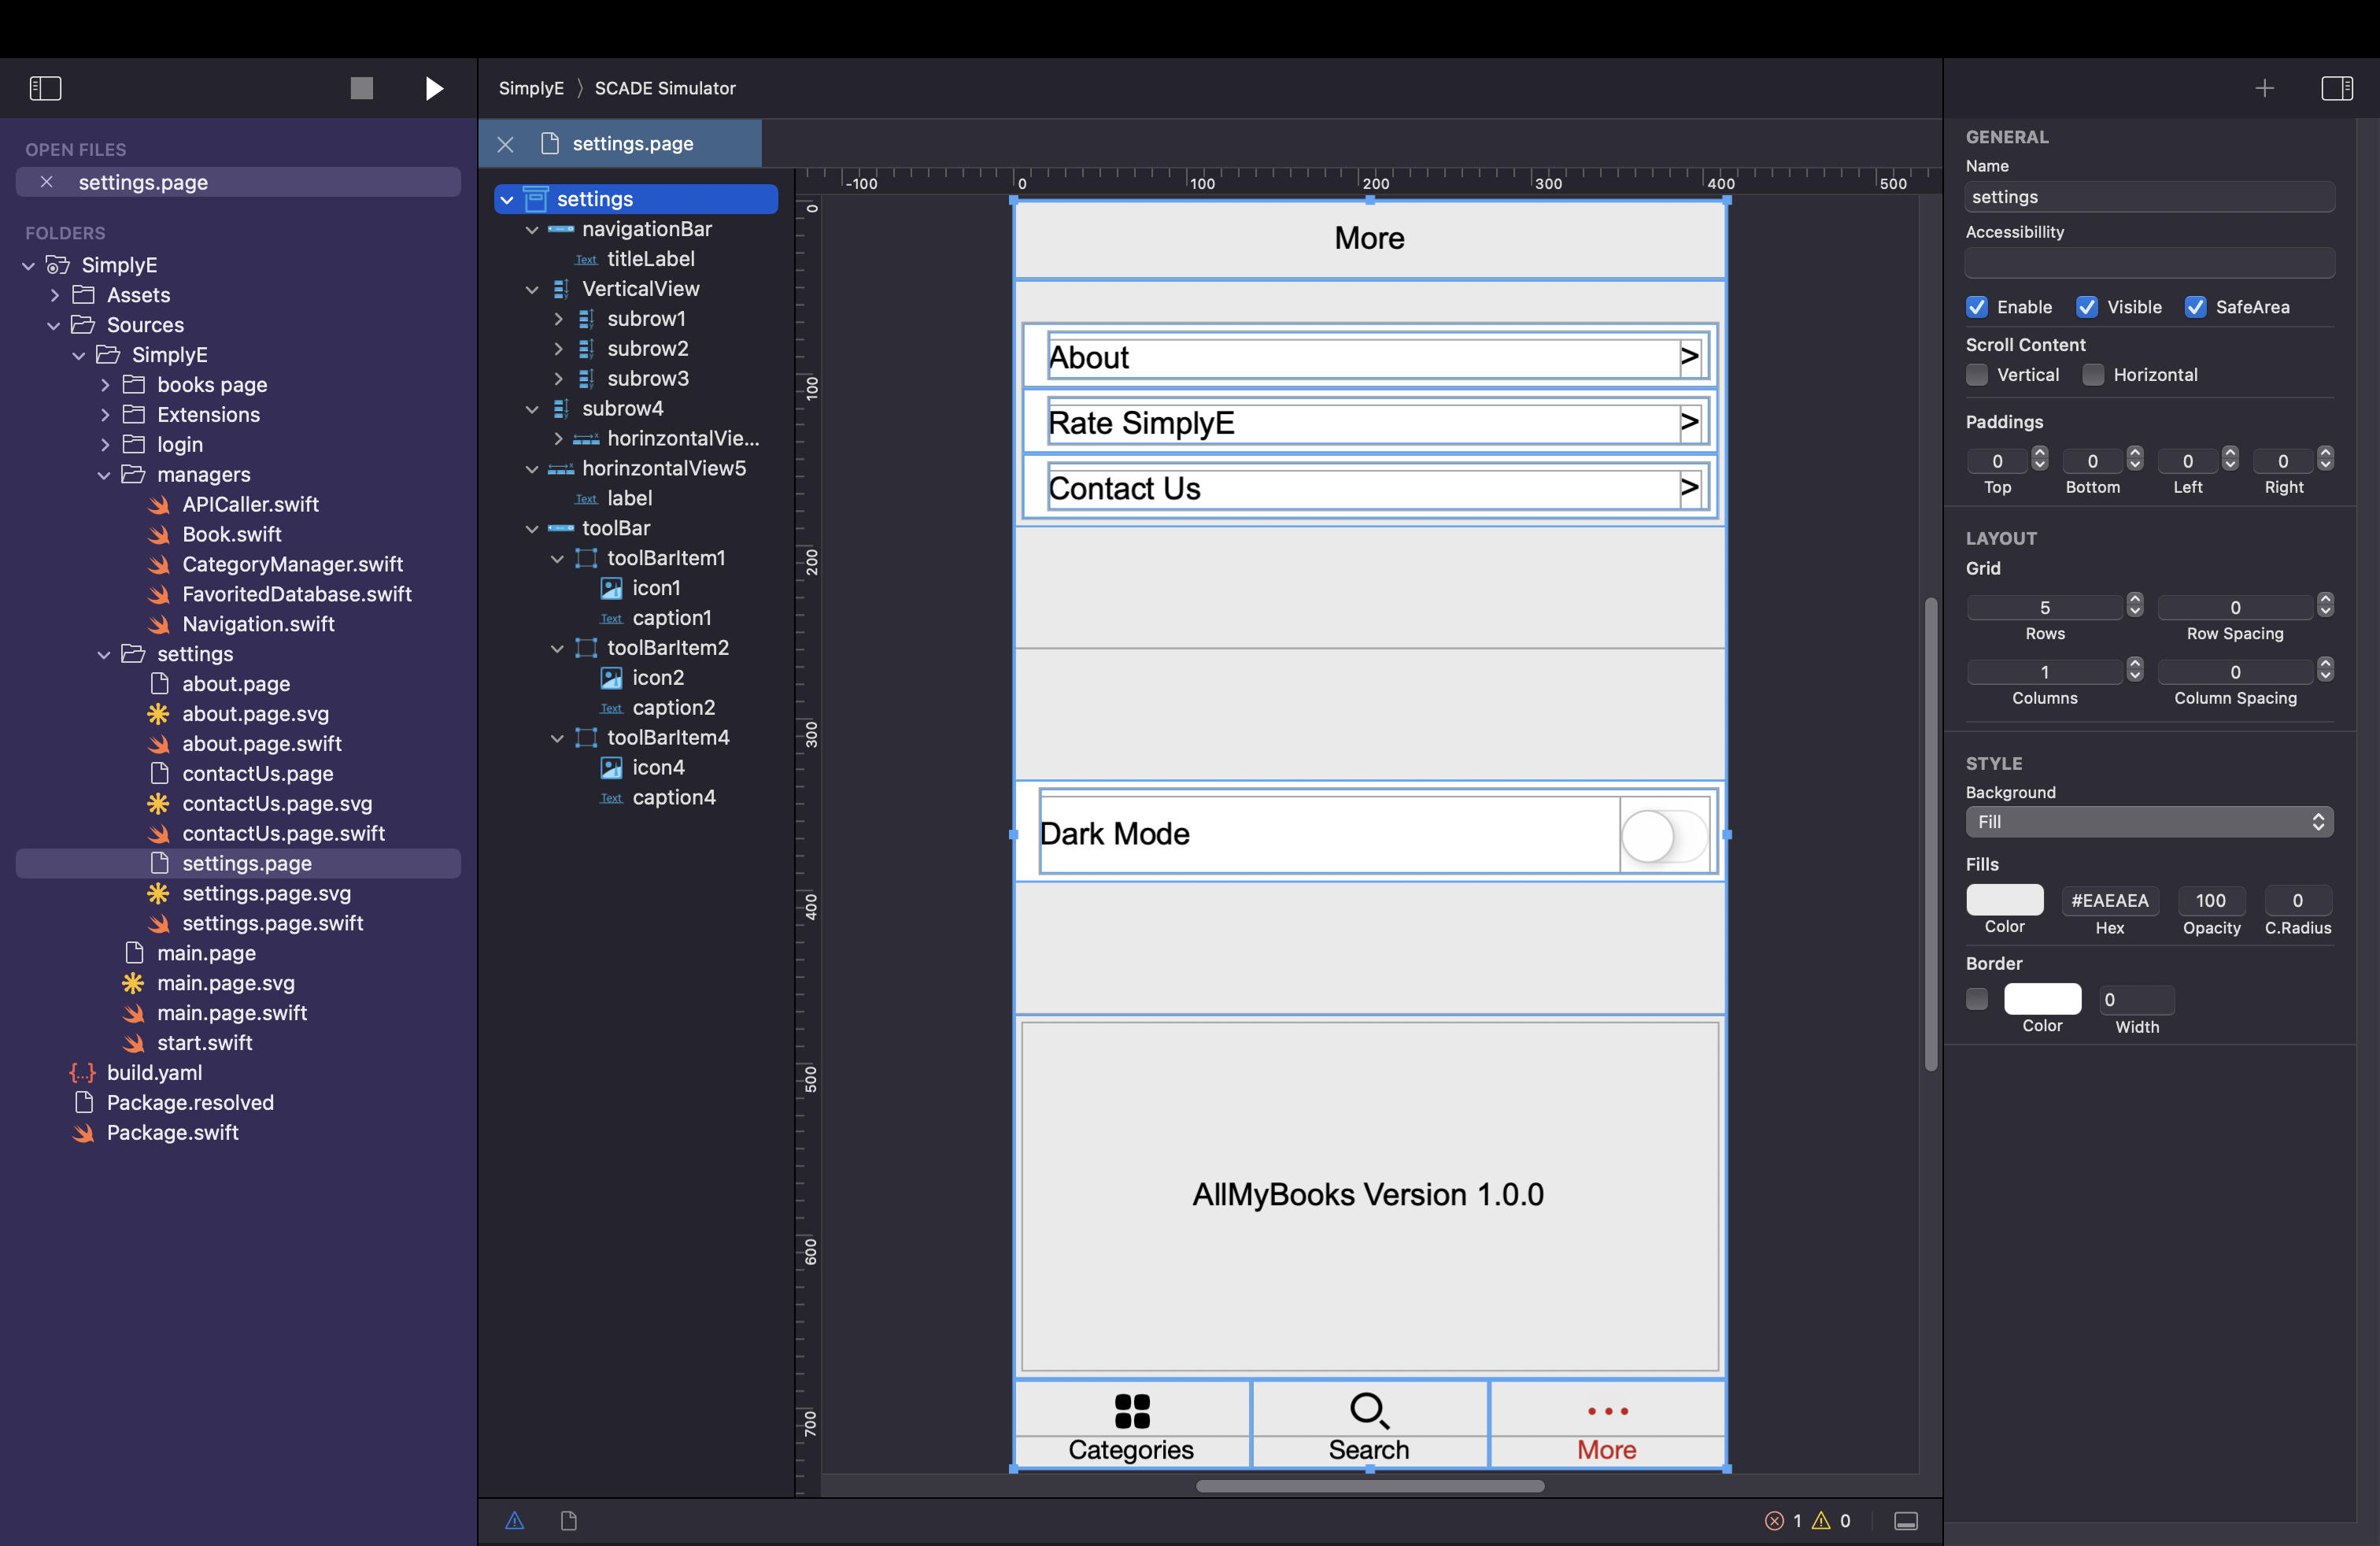
- Select the GridLayout for this page's layout type.
- The settings page is divided into five rows: the navigationBar, VerticalView, subrow4*, horinzontalView5 and toolBar.
- The navigationBar is placed in the first row with a titleLabel, carrying a "More" text, centred inside it.
- The VerticalView container, in the second row, is divided into three rows. Each row is also a vertical container with a white background named subrow1, subrow2, and subrow3 respectively.
- An horizontal container is placed inside each of subrow1, subrow2 and subrow3 with the name horinzontalView1, horinzontalView2, and horinzontalView3 respectively.
- One leading and trailing labels are configured inside each of the above horizontal containers to denote their description.
- Another horizontal container (horinzontalView4) is placed inside another vertical container (subrow4) takes up the third row for this page to contain a darkModeLabel and a checkbox1.
- The page fourth row contains just a label with a text about the app's version. This label is put inside a horizontal container for better alignment.
- A toolBar with three toolBarItems for managing page navigations on the settings page is in the final row. toolBarItem1 reach the catalogue browsing page, while toolBarItem2 reaches the search page.
- Use the Alignment and Wrap/Fill properties on the page editor panel to size and position the containers and widgets stated above for this page.
Logic for the Settings Page
Add an event handler to the about.page, contactUS.page, main.page and search.page to capture click event from horinzontalView1, horinzontalView3, toolBarItem1 and toolBarItem3 respectively inside the load() method.
import Foundation
import ScadeKit

class SettingsPageAdapter: SCDLatticePageAdapter {

  // page adapter initialization
  override func load(_ path: String) {
    super.load(path)

    self.horinzontalView1.onClick { _ in
      Navigation.go(.about, clearHistory: true)
    }

    self.horinzontalView3.onClick { _ in
      Navigation.go(.contactUs, clearHistory: true)
    }

    self.toolBarItem1.onClick { _ in
      Navigation.go(.main, clearHistory: true)
    }

    self.toolBarItem2.onClick { _ in
      Navigation.go(.search, clearHistory: true)
    }
  }
Updated 2 months ago